Canceling a Scheduled Broadcast
If you’ve scheduled a broadcast but decide not to send it, Convers8 allows you to cancel it before the scheduled send time. Canceling prevents the broadcast from being delivered.
When You Can Cancel a Broadcast
You can only cancel broadcasts that are:
- In Scheduled status, and
- Have not yet been sent to recipients.
Once the broadcast has been sent, it can no longer be canceled—you’ll need to delete it instead.
How to Cancel a Scheduled Broadcast
Step 1: Navigate to Broadcasts
From the sidebar, open the Broadcasts section.
Step 2: Locate the Scheduled Broadcast
Go to the Scheduled tab to view all upcoming broadcasts. Find the specific broadcast you wish to cancel.
Step 3: Cancel the Broadcast
Click the Cancel button beside the broadcast entry. A confirmation modal will appear asking you to confirm your action.
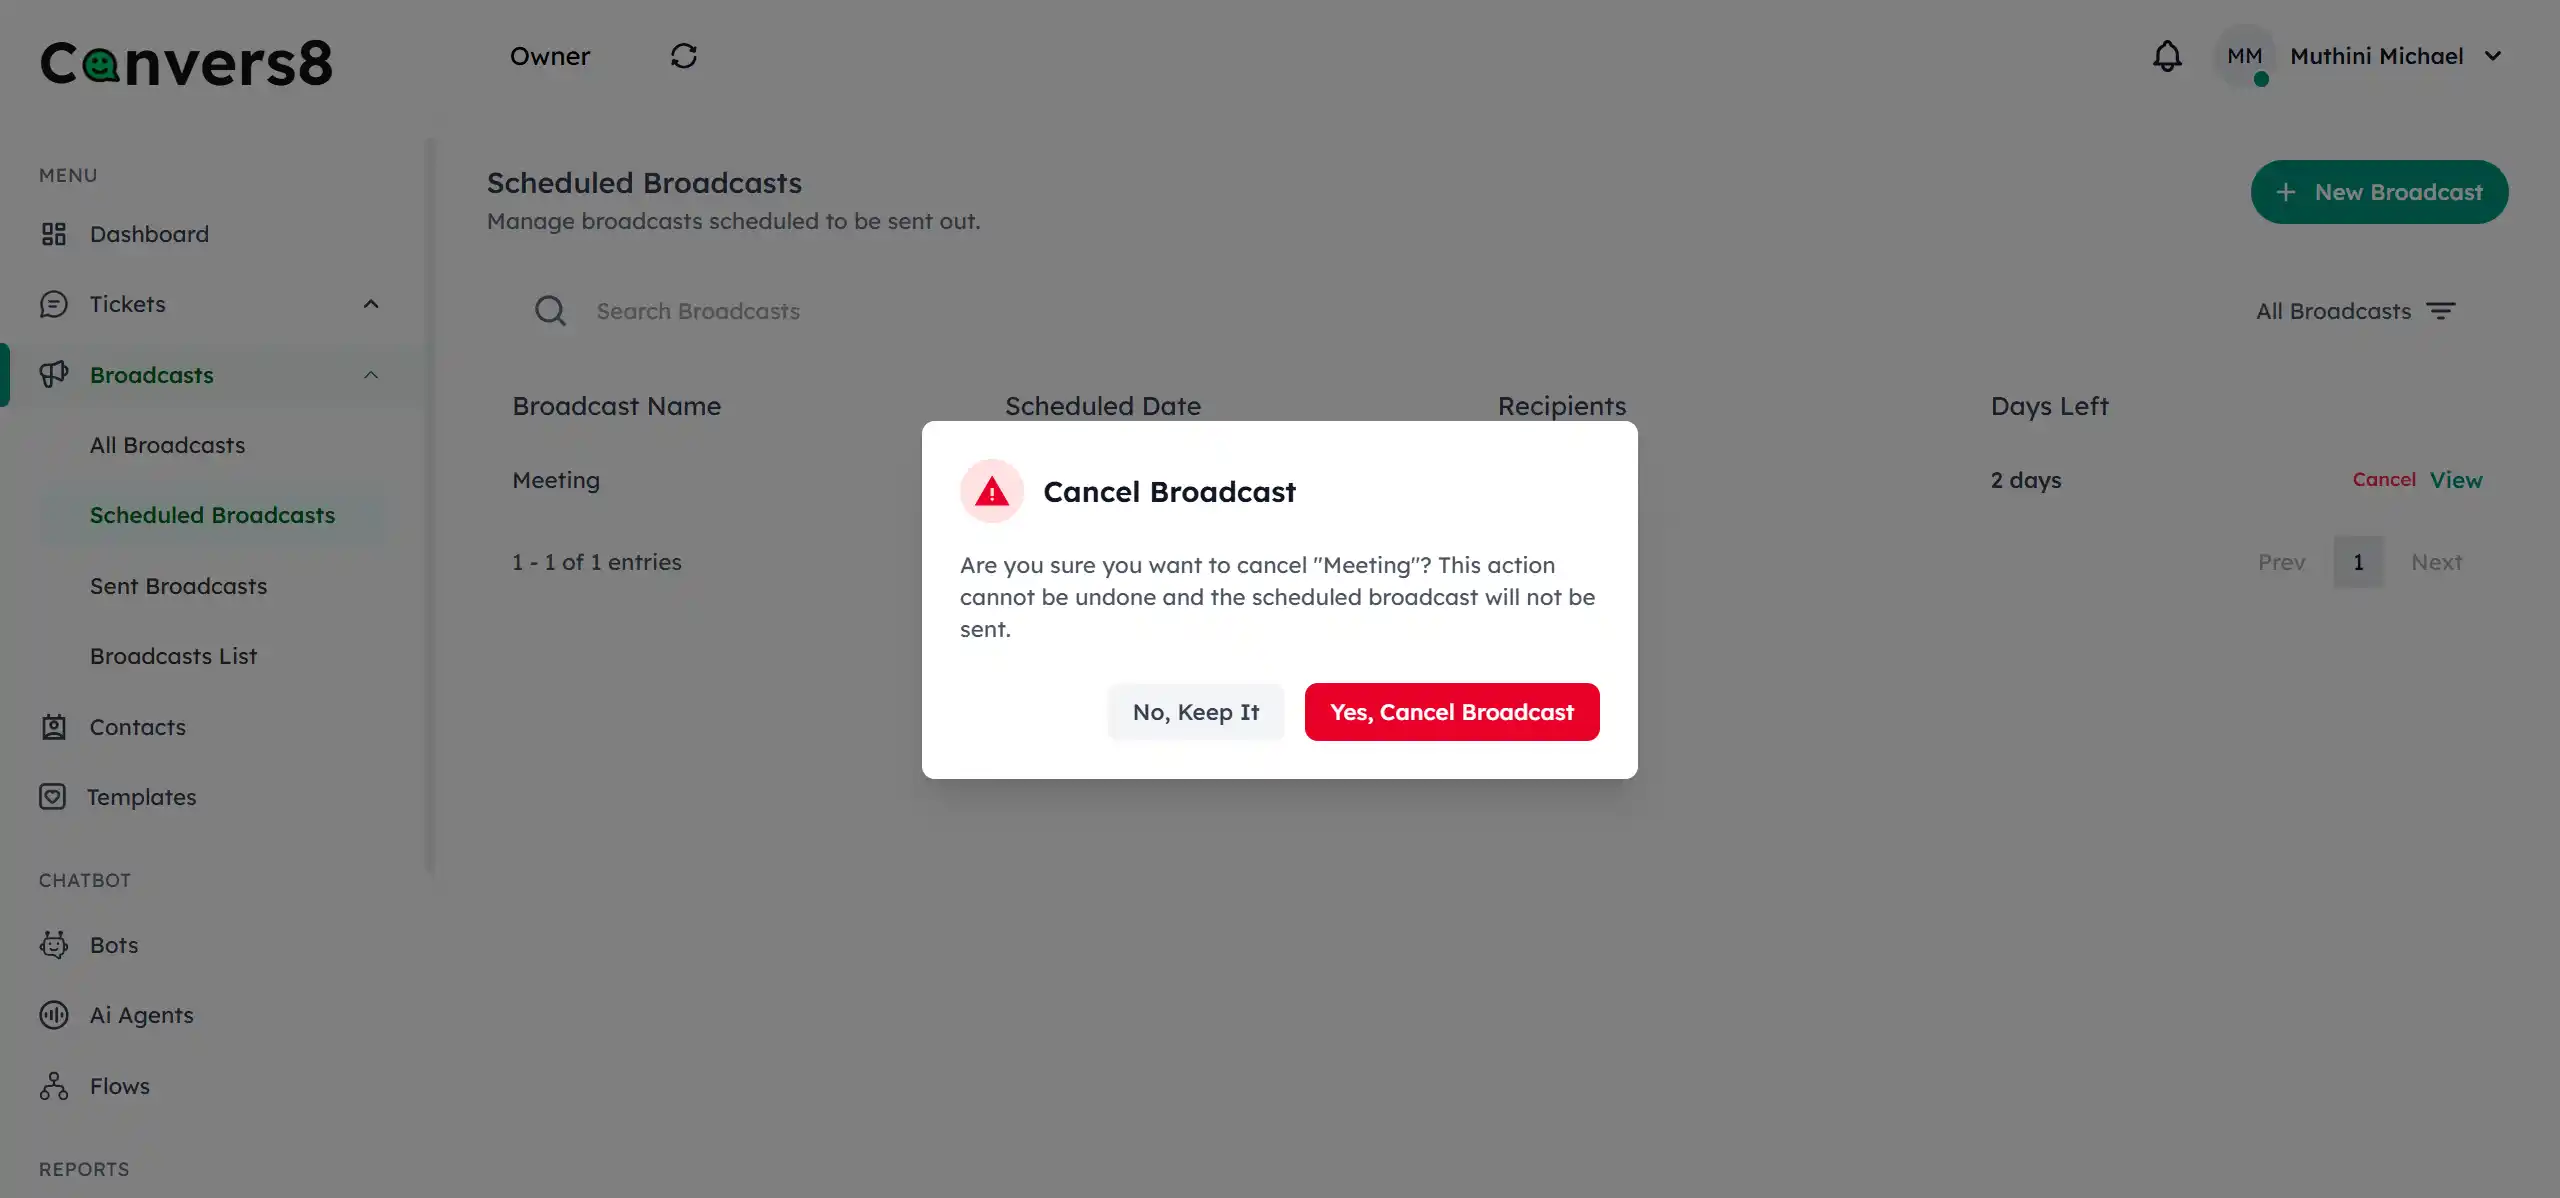
Step 4: Confirm the Cancellation
Click Cancel Broadcast in the confirmation modal. The broadcast will move to a Canceled state and will not be sent at the scheduled time.
What Happens After Canceling
- The broadcast remains visible in your Broadcasts history with a Canceled status.
- You can still view its details and analytics, but the system will not send it.
- Canceled broadcasts cannot be edited, but they can be deleted.
Tips for Canceling Broadcasts
- Cancel as early as possible to ensure no messages are queued for sending.
- If you’re unsure, consider editing the broadcast instead of canceling.
Next: Deleting a Broadcast →