Meta Business App Setup
To finish connecting WhatsApp, you’ll need to create a Meta Developer App. Don’t worry — it only takes a few minutes.
1. Go to Meta Developers
Head to Meta for Developers and log in with the same account linked to your Business Manager.
2. Create a New App
Click “My Apps” → “Create App”
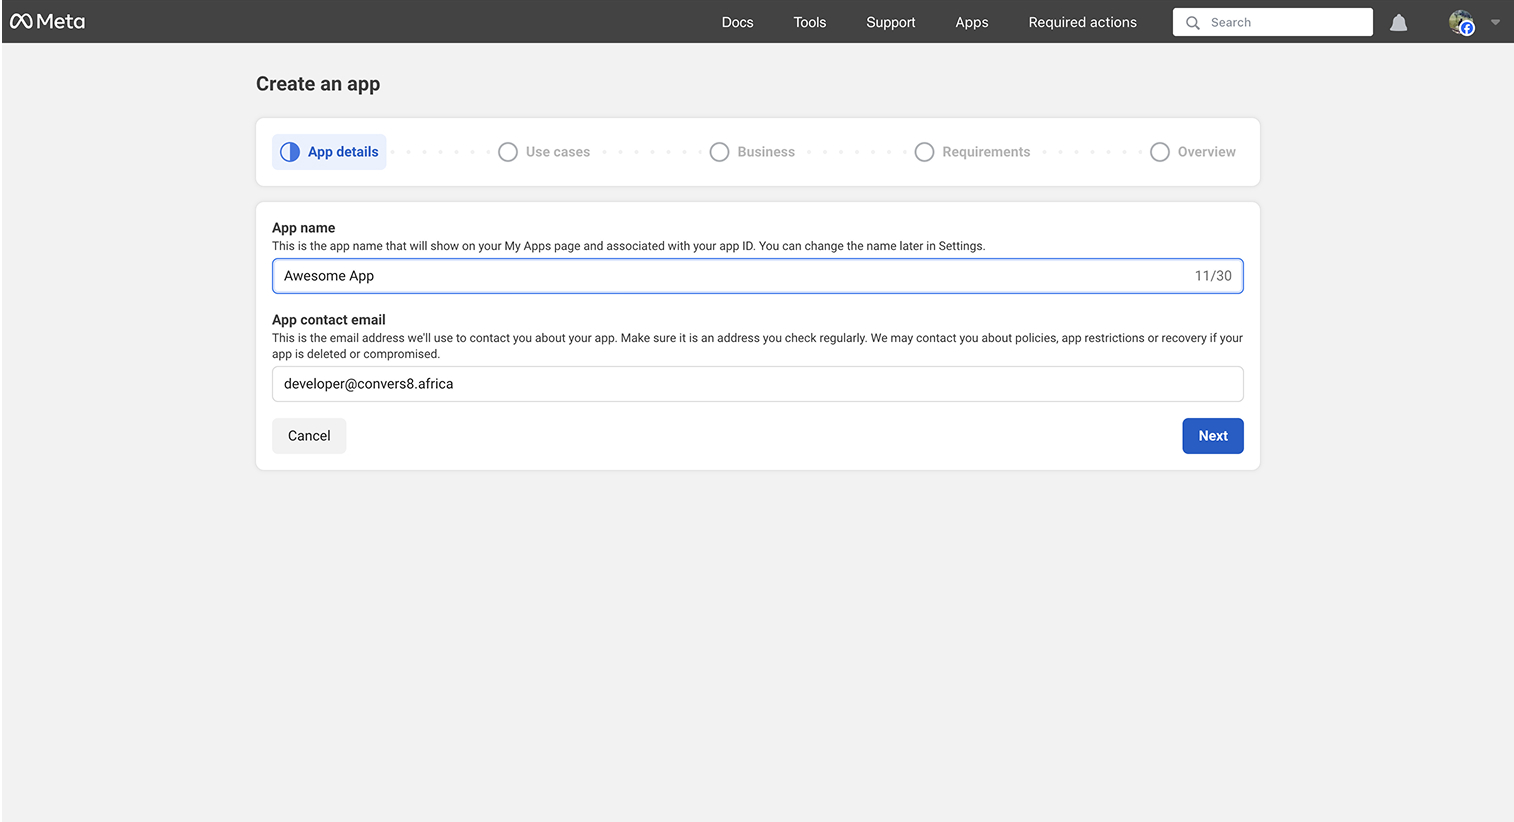
For better setup choose other

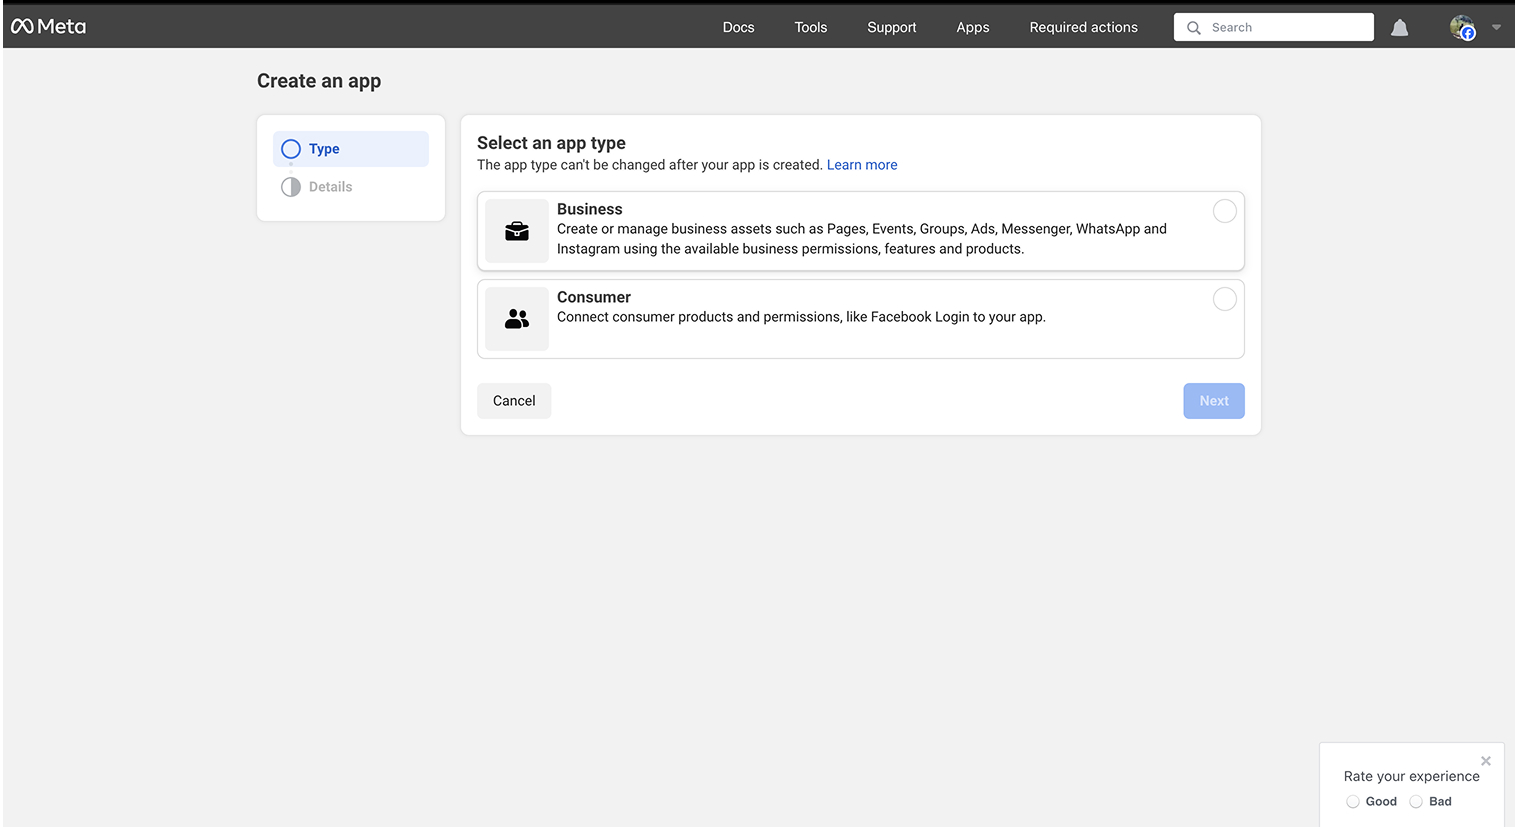
Select Business as the app type
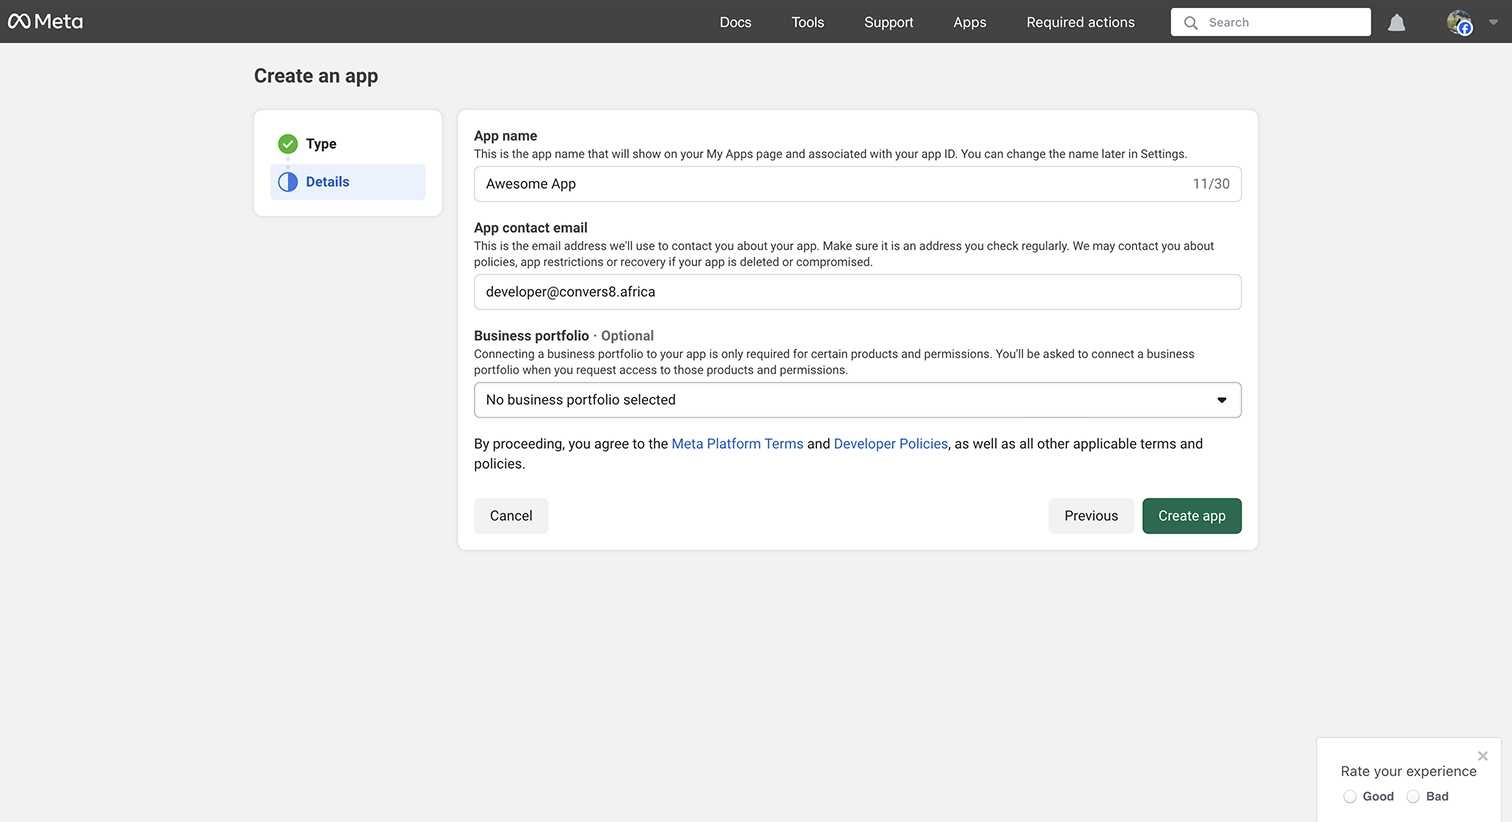
Give your app a clear name (e.g., Convers8 Integration)
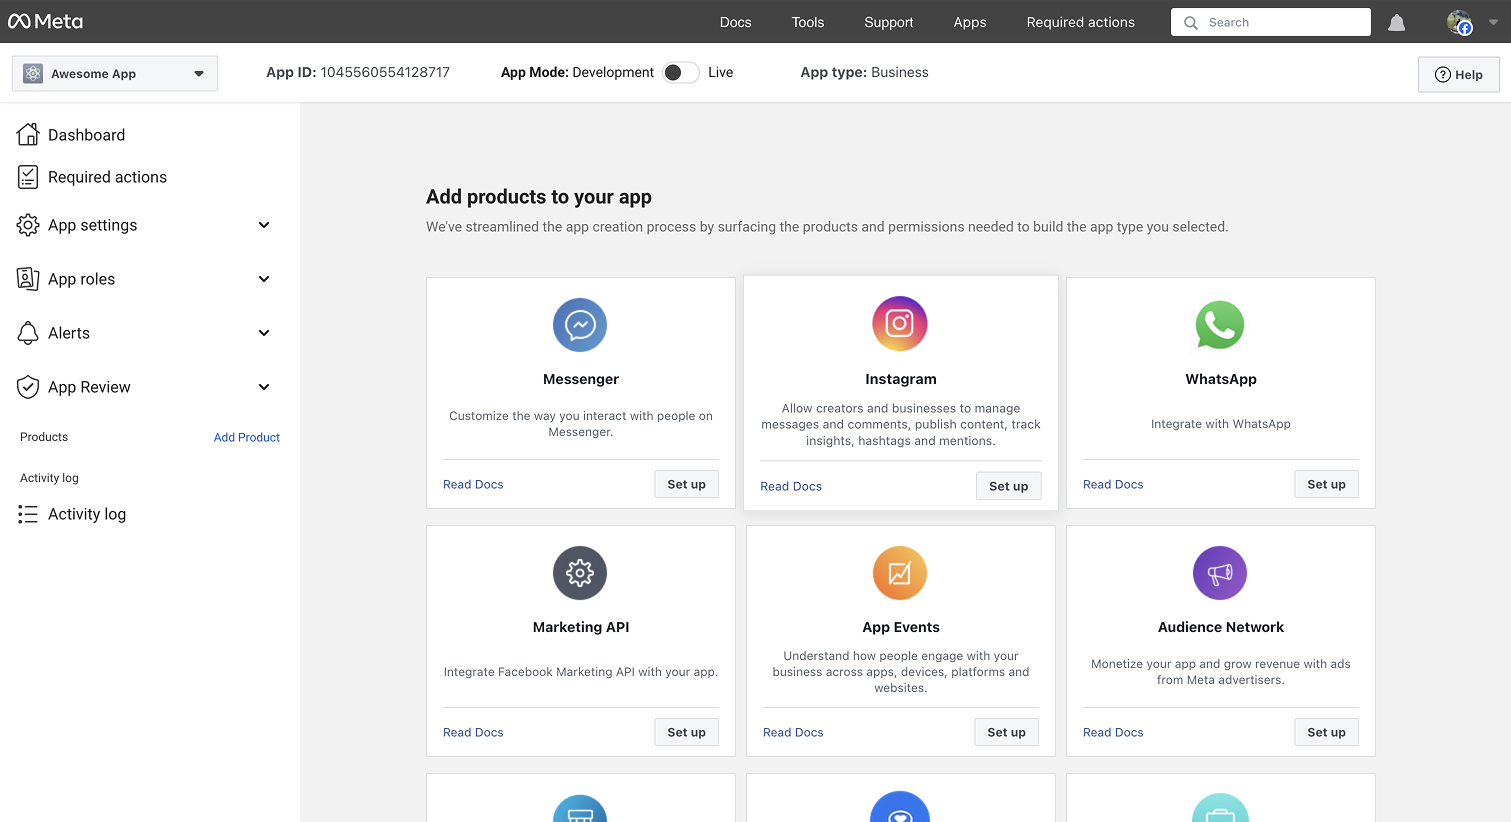
3. Add WhatsApp Product
From the app dashboard, click Add Product
Choose WhatsApp and confirm
4. Configure Your App
When you add WhatsApp to your Meta App, you’ll go through two quick phases:
(a) Quick Setup
Select your Business Profile.
Continue to the API Setup section. 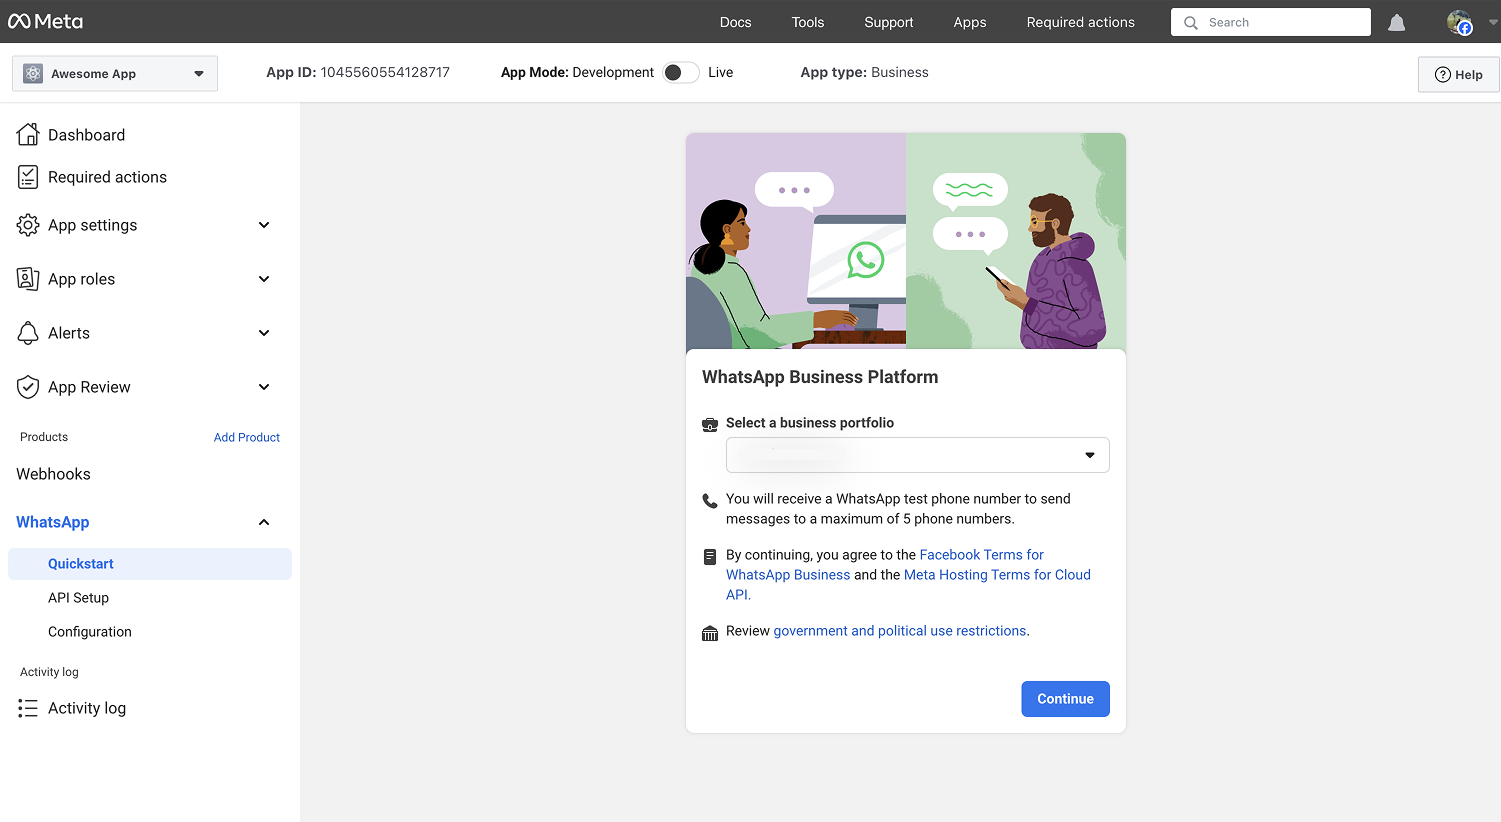
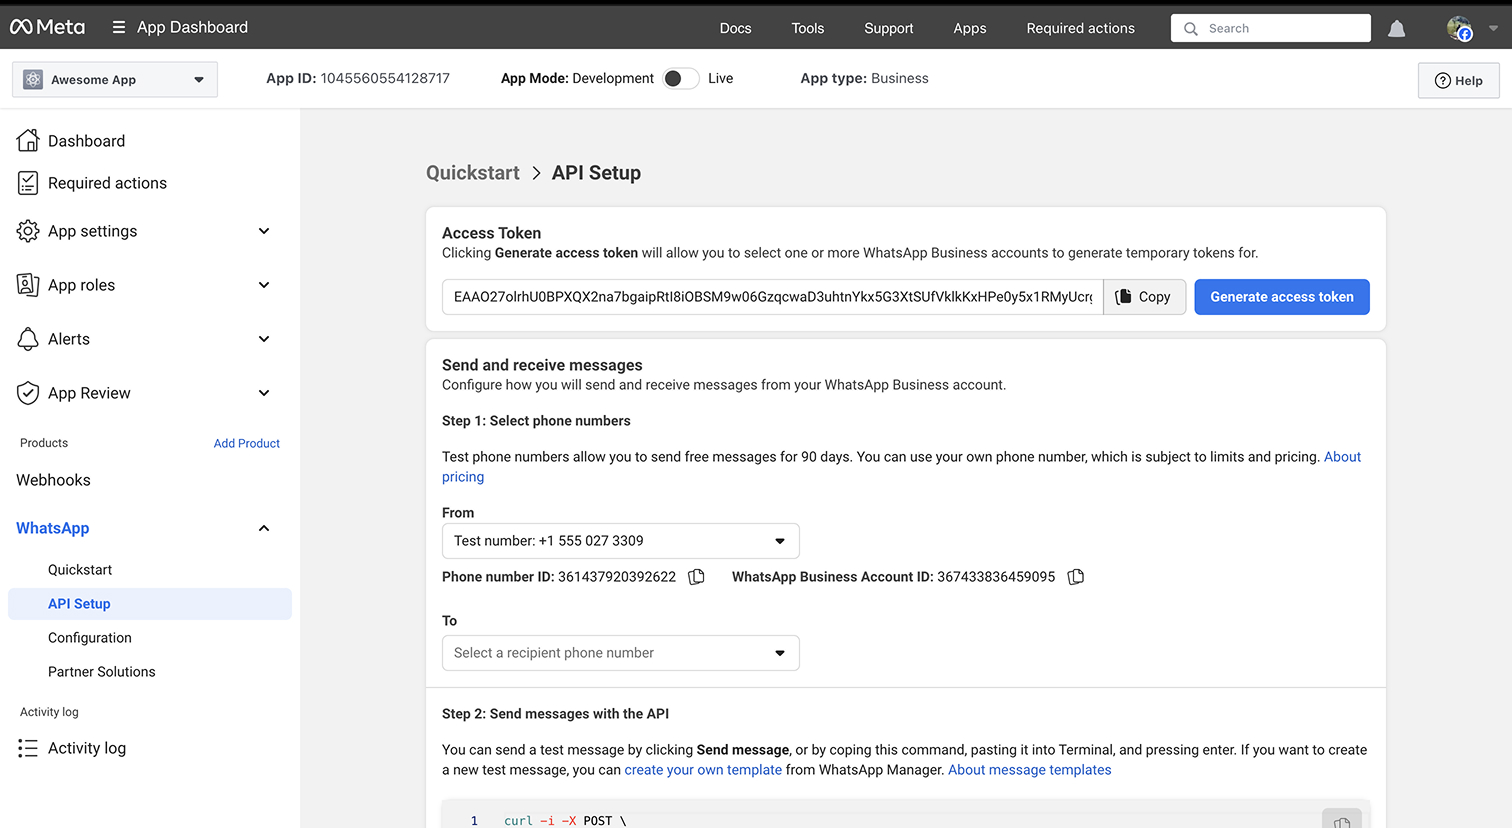
(b) API Setup
Generate a Token: Click to generate an Access Token.
The token you get here is valid for 24 hours — great for testing.
For production, you’ll need a long-lived token. Follow Meta’s guide here.
Copy the Phone Number ID and Access Token from Meta.
💡 Tip: Use the 24-hour token for quick testing, but always switch to a long-lived token for live use. Otherwise, your integration will stop working when the short token expires.
Paste these details (Phone Number ID, Access Token, and Verify Token) into Convers8 under the onboarding screen. The Verify Token is a unique word you create yourself — don’t confuse it with the Access Token.
💡 Tip: The Verify Token is not generated by Meta — you choose it when setting up Convers8. Make sure you use the exact same word when adding it to your Meta App configuration.
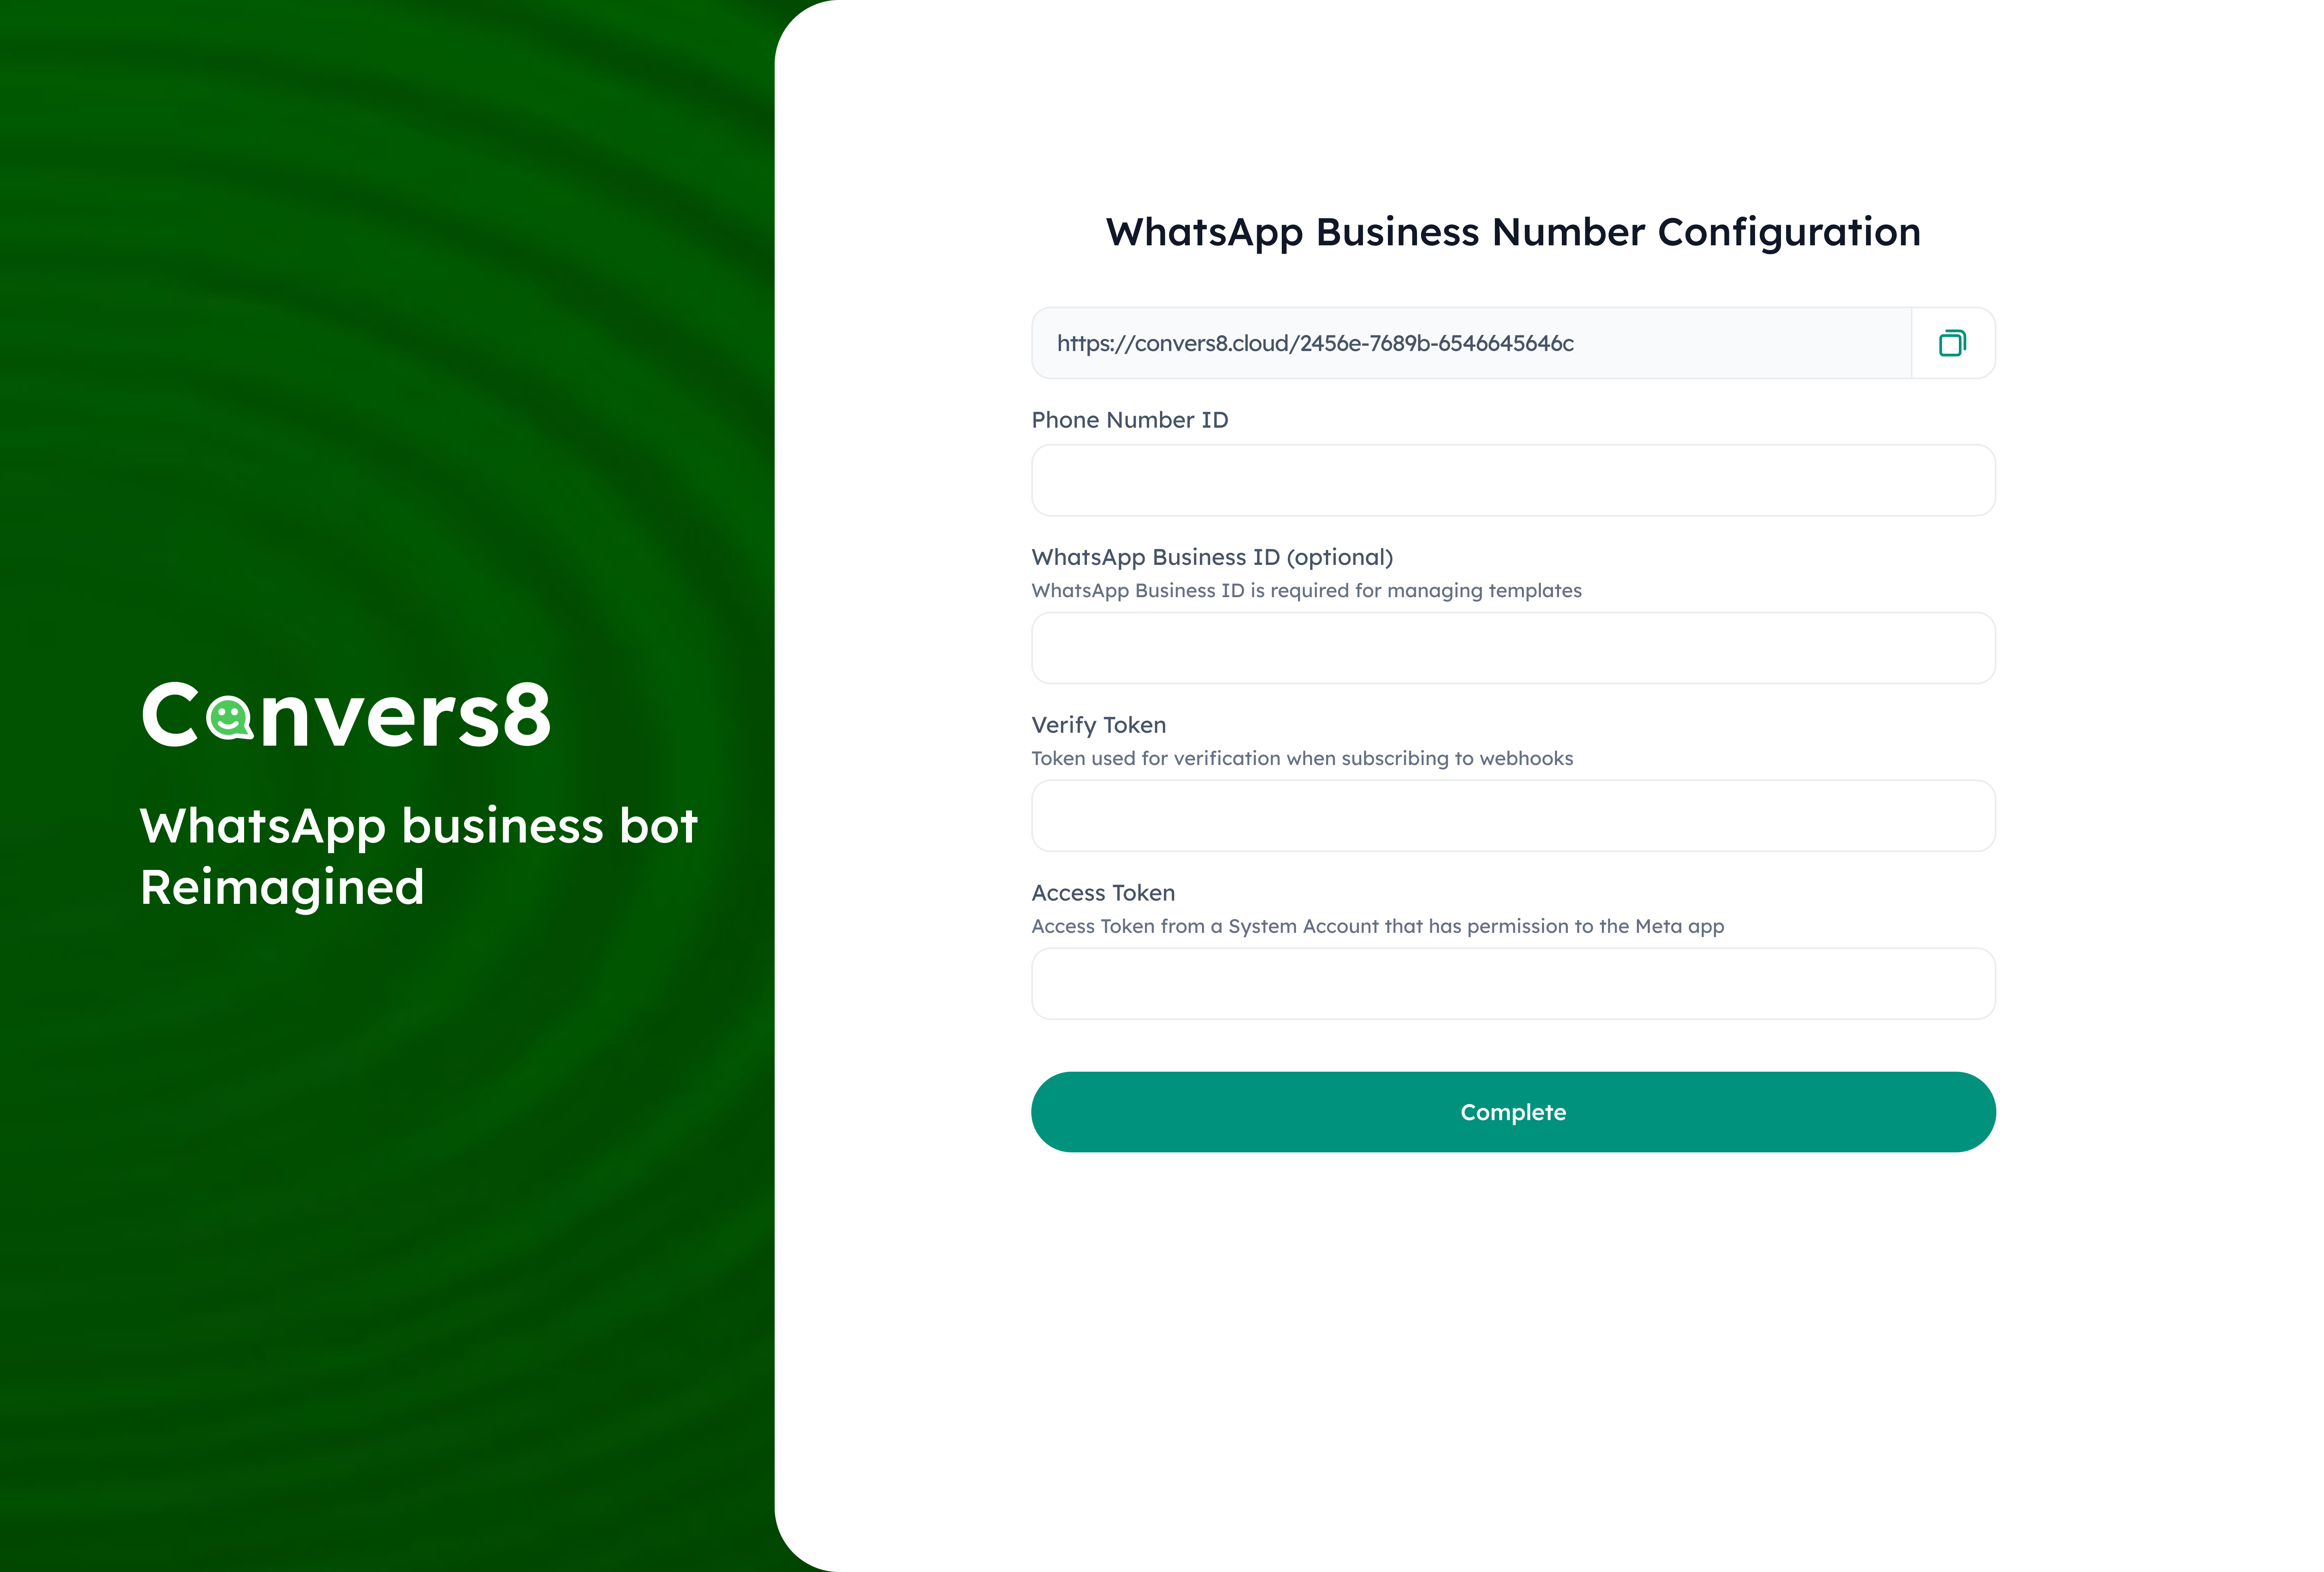
Save, and you’ll be redirected to the Convers8 dashboard.
💡 Tip: If you forget to copy the Webhook URL during setup, you can always find it later in Convers8 under Waba Settings → WABA Details (bottom menu item).
(c) Webhook Configuration
In your Meta App, go to WhatsApp → Configuration.
Paste the Webhook URL and Verify Token from Convers8. 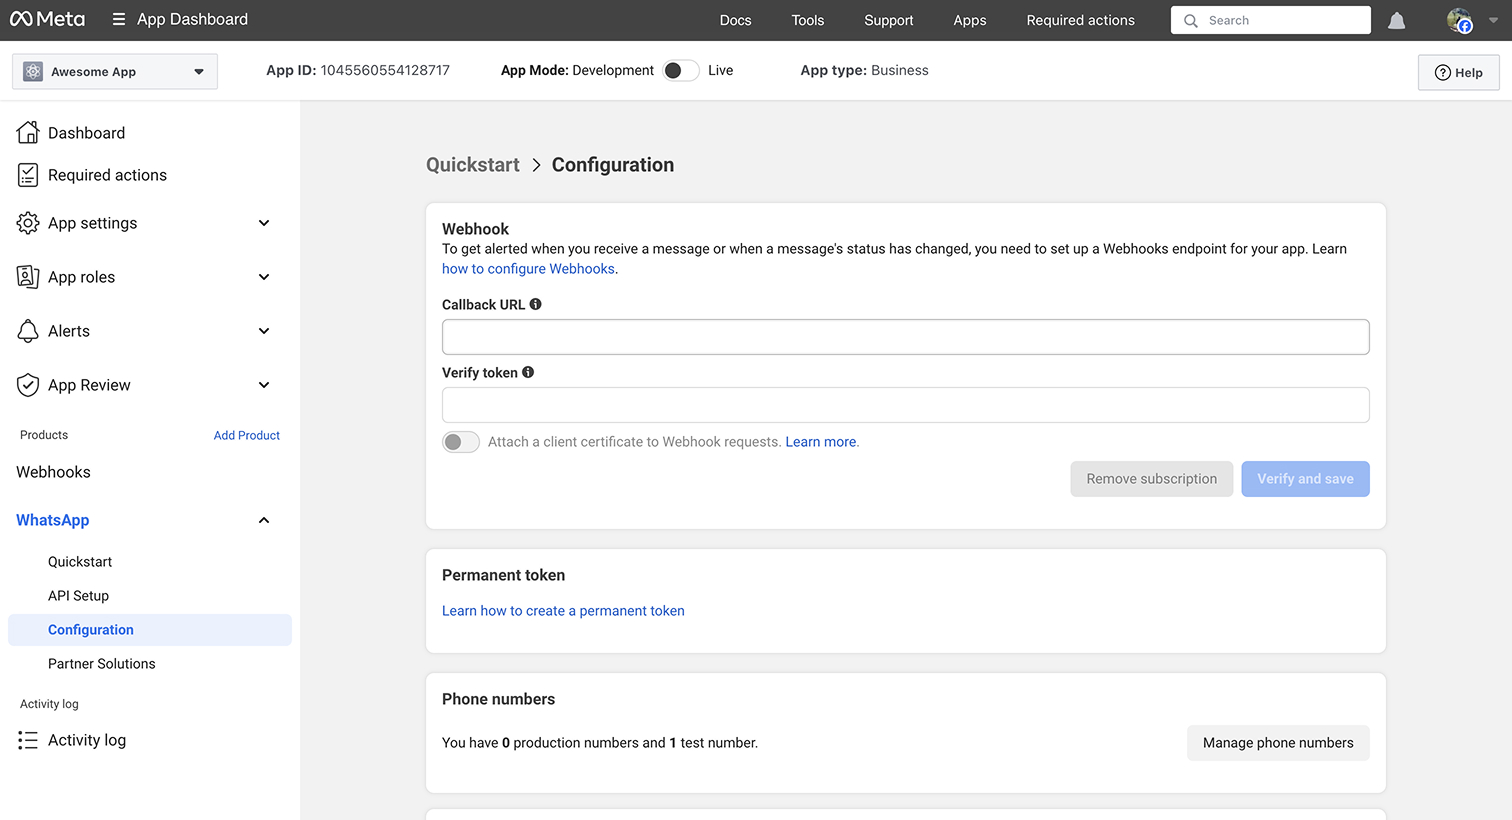 Under Webhook Fields, enable Messaging.
Once saved, your Meta App and Convers8 are fully connected 🚀.