Importing Contacts
The Import Contacts feature lets you quickly upload multiple contacts at once, saving time when migrating customer data or onboarding a large audience. Convers8 supports importing from CSV, XLS, or XLSX file formats.
How to Import Contacts
Step 1: Navigate to Contacts
Go to the Contacts section from your sidebar panel.
Click New Contact at the top right of the page.
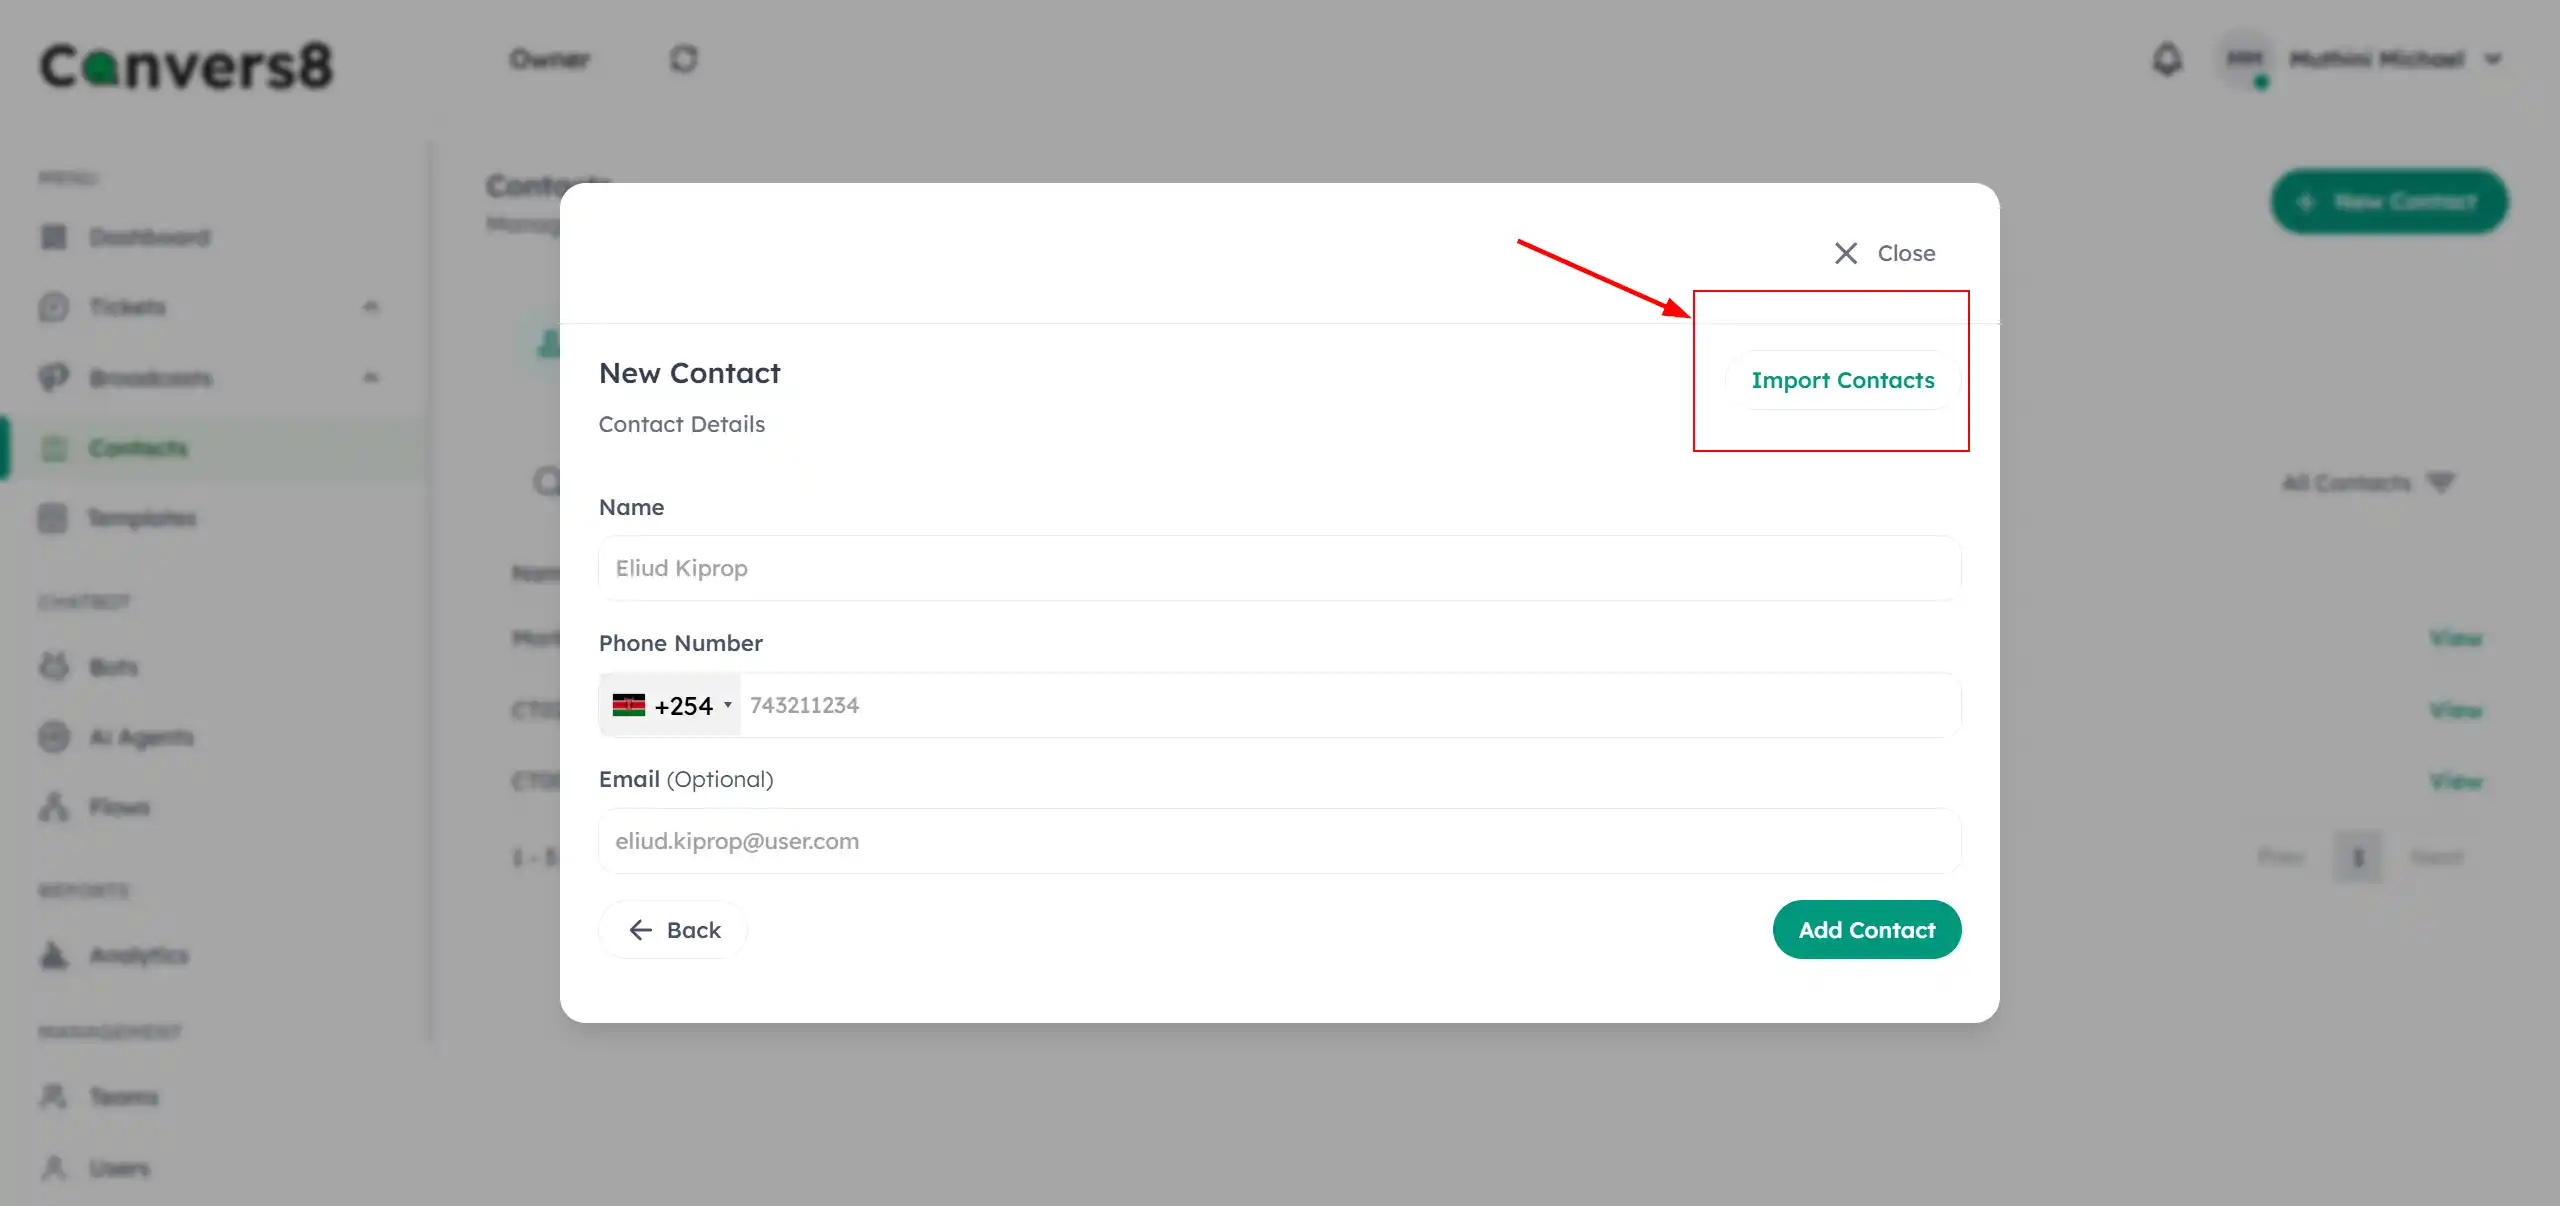
Step 2: Choose “Import Contacts”
In the top-right corner of the New Contact dialog, click Import Contacts.
Step 3: Upload Your File
Select your contact file from your computer. Convers8 accepts:
- CSV (.csv)
- Excel (.xls or .xlsx)
If you’re unsure about formatting, click Download Sample File, fill it with your contact data, and re-upload it.
Step 4: Review and Map Data
Convers8 automatically previews your uploaded data.
- Ensure that each column (e.g., Name, Phone, Email) is correctly mapped to its corresponding field.
- Delete or modify any unwanted columns before finalizing the import.
Step 5: Confirm and Import
Once the data looks correct, click Add Contact to complete the import. The system will confirm successful uploads and flag any invalid or duplicate entries.
Import File Format Guidelines
| Column | Required | Description |
|---|---|---|
| Name | ✅ | Customer’s full name |
| Phone | ✅ | WhatsApp-registered phone number (include country code) |
| ❌ | Optional, for cross-channel use |
Pro Tips
- Use international phone number formatting (
+27,+234,+254, etc.). - Avoid empty rows or special characters in your CSV file.
- Keep the header names simple and in English to ensure proper field mapping.
- If you’re importing thousands of contacts, consider doing it in smaller batches for faster validation.